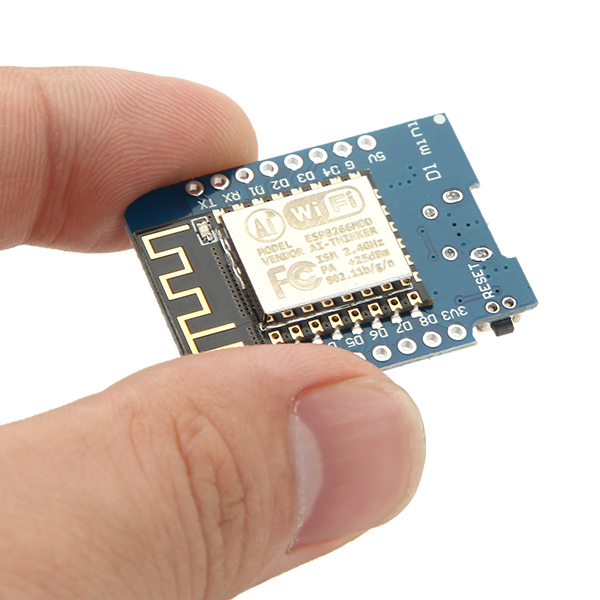
Ah Arduino. You were my first gateway to making tiny electronic widgets that interact with the world. I’ve played with platforms that range from small and simple to expensive and complex like FPGAs, but nothing beats the cost and ease-of-use of Arduinos for making tiny devices you sprinkle around your home. Until now…
See the thing is, WiFi has become as common as electricity in many countries. So I keep finding that I want all my devices to connect to the internet — something that Arduino doesn’t do very well. Especially if you want to talk at a higher level; like with HTTP or MQTT. Plus, getting WiFi-enabled Arduino chips or going with alternative platforms like Electric Imp can get pricey.
So that led me to a family of devices built around the ESP8266 chip. Not only do these tend to be cheaper than Ardunios, they have integrated WiFi! (E.g.: D1 mini NodeMCU).
But I noticed something popular among users of these devices. They don’t use the normal Arduino platform, but instead a different NodeMCU firmware. I looked it up and what I liked about it was that its firmware libraries help you do many complex things you normally want to, easily. E.g., you can make your NodeMCU device a web server, or talk MQTT with just a few lines of code.
So I got a NodeMCU chip for under $3 to play with one weekend. I figured out how to flash the firmware and upload my code to it. The process is slightly different from using an Arduino. So I compiled all my notes, scripts and whatever else I needed into a bare-bones package. I plan to use this as my personal template for starting new NodeMCU projects. Since it might be useful to others too, I posted it to github here:
https://github.com/secretsciencelab/nodemcu-skeleton
The broad steps for starting a NodeMCU project are:
- Download and build the firmware. I recommend using the Docker option. That way, all you do is download the firmware source code from git, customize it (optional), then use docker to build it.
- Flash the firmware. The flash command is also in the link in the previous step. Or check out “flash.sh” in my nodemcu-skeleton git.
- Upload your code using luatool. See “upload.sh” in my git’s ‘test’ dir for reference.
Although the steps are more ‘manual’ than with Arduino, I actually like it better. I never liked working in the clunky Arduino IDE. I prefer coding in my favorite editor, then uploading to the device via command-line. Working with NodeMCU does come with its own quirks, but they’re not too bad once you get into the groove.
I am still experimenting with these $3 NodeMCU chips, but so far I’m liking it. My first project was a sound monitor to keep an ear on the house while we were away for a few days. This was mainly because my wife was worried about leaks from her new aquarium setup. So first, we placed regular water alarms under the aquariums. The sound monitor measures the sound level continuously and streams the data to the web (via Thingspeak). Then I have a cron job that watches the data stream and emails me if anything looks funny. It’s sensitive enough to detect anything from doorbells, loud conversations and microwave beeps… to water alarms and fire alarms.
I might switch to these NodeMCUs as my go-to device for all my future projects!
Happy hacking 🙂
